
What Will You Need?
An empty toilet roll
Colored paper/thin card
Eye stickers
Scissors
Glue
Implementation
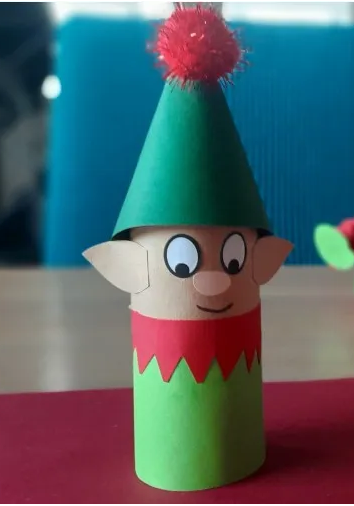
Start by colouring your toilet roll, you’ll want to make the bottom 2/3rds of the toilet roll the body colour and the top 1 skin colour. To make ours we cut out strips of green and skin tone paper and glued them around the toilet roll but you could always use paint or good markers!
Cut out a pie slice shape and roll it around to make a cone for the elf’s Christmas hat. Glue the hat onto the top of the cone.
Give the little tp roll elf a face by adding two eyes, a mouth and a nose.
Now its time to bring the little elf to life by giving him two pointy ears. Add any decorations, we gave this little guy a zig zag collar and a pom pom on his hat. You could also add some hair!
To make the arms and legs you will need to make four springs. To make a spring, cut out two thin paper strips, glue them together at a right angle and then take turns folding one strip over the other. Once you reach the end glue the two loose ends together. Once you have your four springs made, cut out two mitten shapes and two boot shapes.
Glue two springs at the bottom of the toilet roll to make two legs. Then glue the other two at collar level. Stick a mitten on the end of each arm and a boot at the end of each leg. Leave until dry and your adorable toilet roll Christmas elf is finished!
Credit: Original Source
Impact
Encourages EA & D, UW, C & L
Category
- Communication and Language
- Personal , Social and Emotional Development
- Physical Development
- Literacy
- Mathematics
- Understanding the World
- Expressive Arts and Design